# Creating a New Project in Vivado
To create a new project in Vivado for the Nexys A7 development board, follow the steps below.
1. Launch Vivado.
2. Click `Create Project`.
3. In the dialog that appears, click `Next`.
4. Enter the project name (no spaces or Cyrillic characters) → Select the project folder → Enable the `Create project subdirectory` checkbox → Click `Next`.
5. Select RTL Project → Enable the `Do not specify sources at this time` checkbox → Click `Next`.
6. Set the following filters to narrow the FPGA list:
- Family: `Artix 7`
- Package: `csg324`
- Speed: `-1`
_Fig. 1_ shows the window with the applied filters.
7. In the list, select the FPGA `xc7a100tcsg324-1` (located at the bottom) → Click `Next`.
8. Click `Finish`.
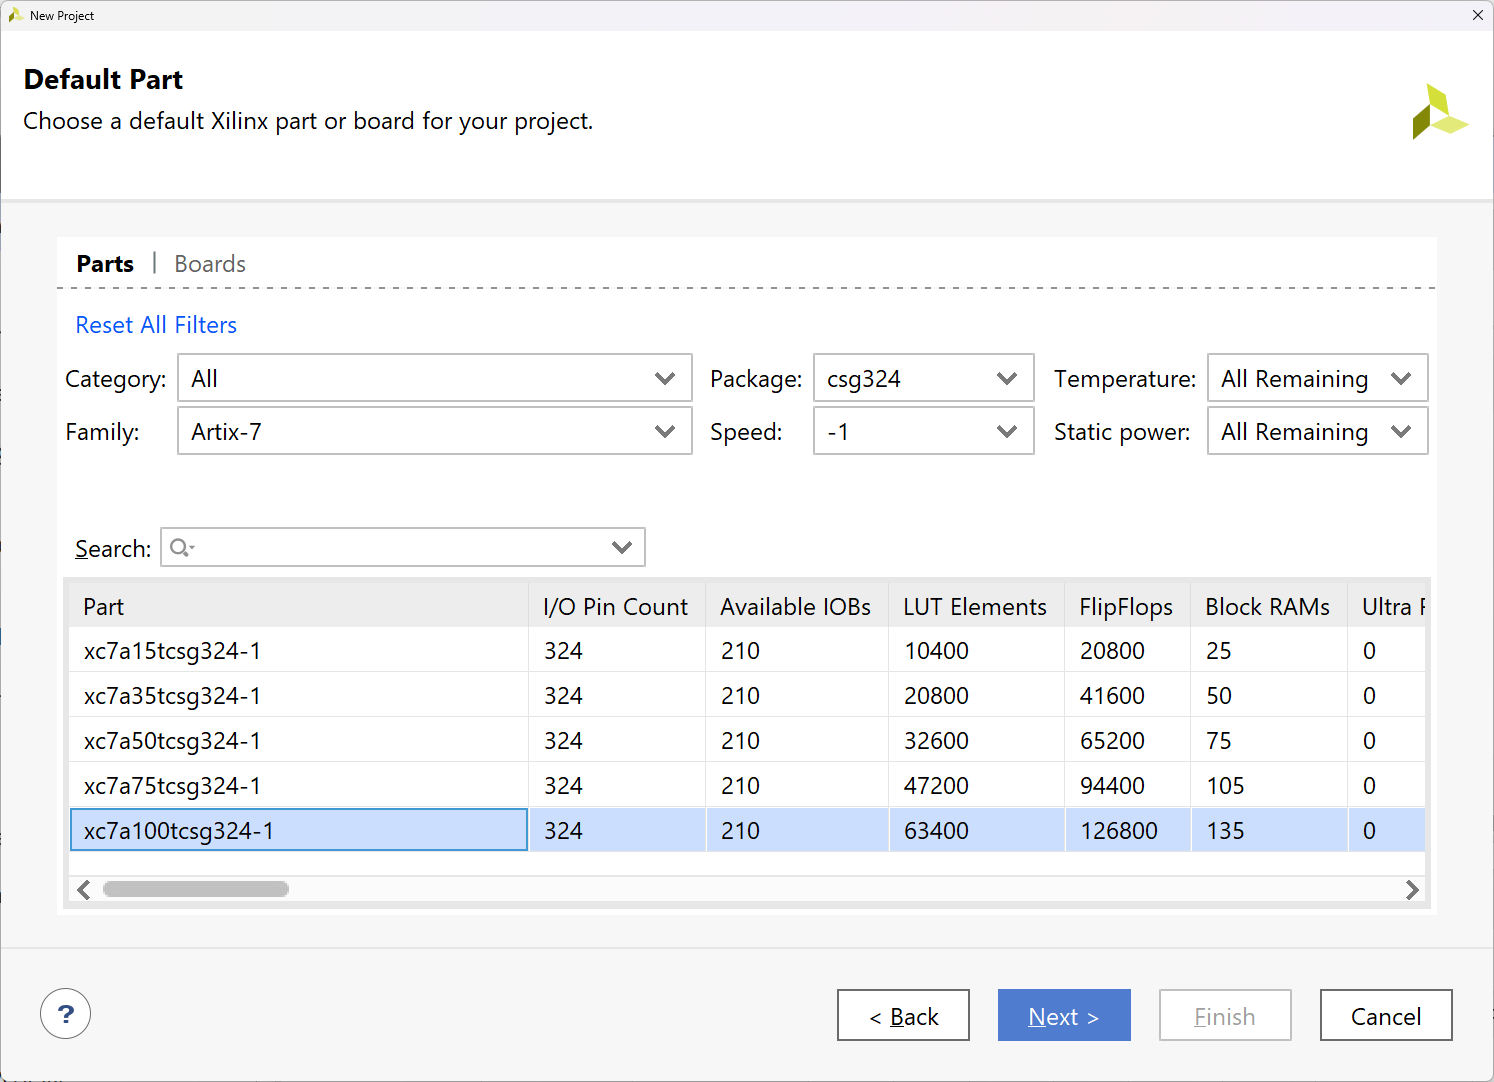
_Figure 1. Example of filter settings for selecting the FPGA used in Nexys A7._
After clicking `Finish`, the newly created project window will open. Now configure the project settings. To do this, click the `Settings` button in the `Flow Navigator` panel on the left side of Vivado.
## New Project Settings
### Simulation Time Configuration
First, specify how much simulation time will be modeled when the simulation is launched. In the `Project Settings` group, select `Simulation`. On the page that opens, go to the `Simulation` tab and set the `xsim.simulate.runtime` field to `1s`. This means that by default, one second of circuit operation will be simulated. _Fig. 2_ shows an example of this setting. Do not close the settings window yet.
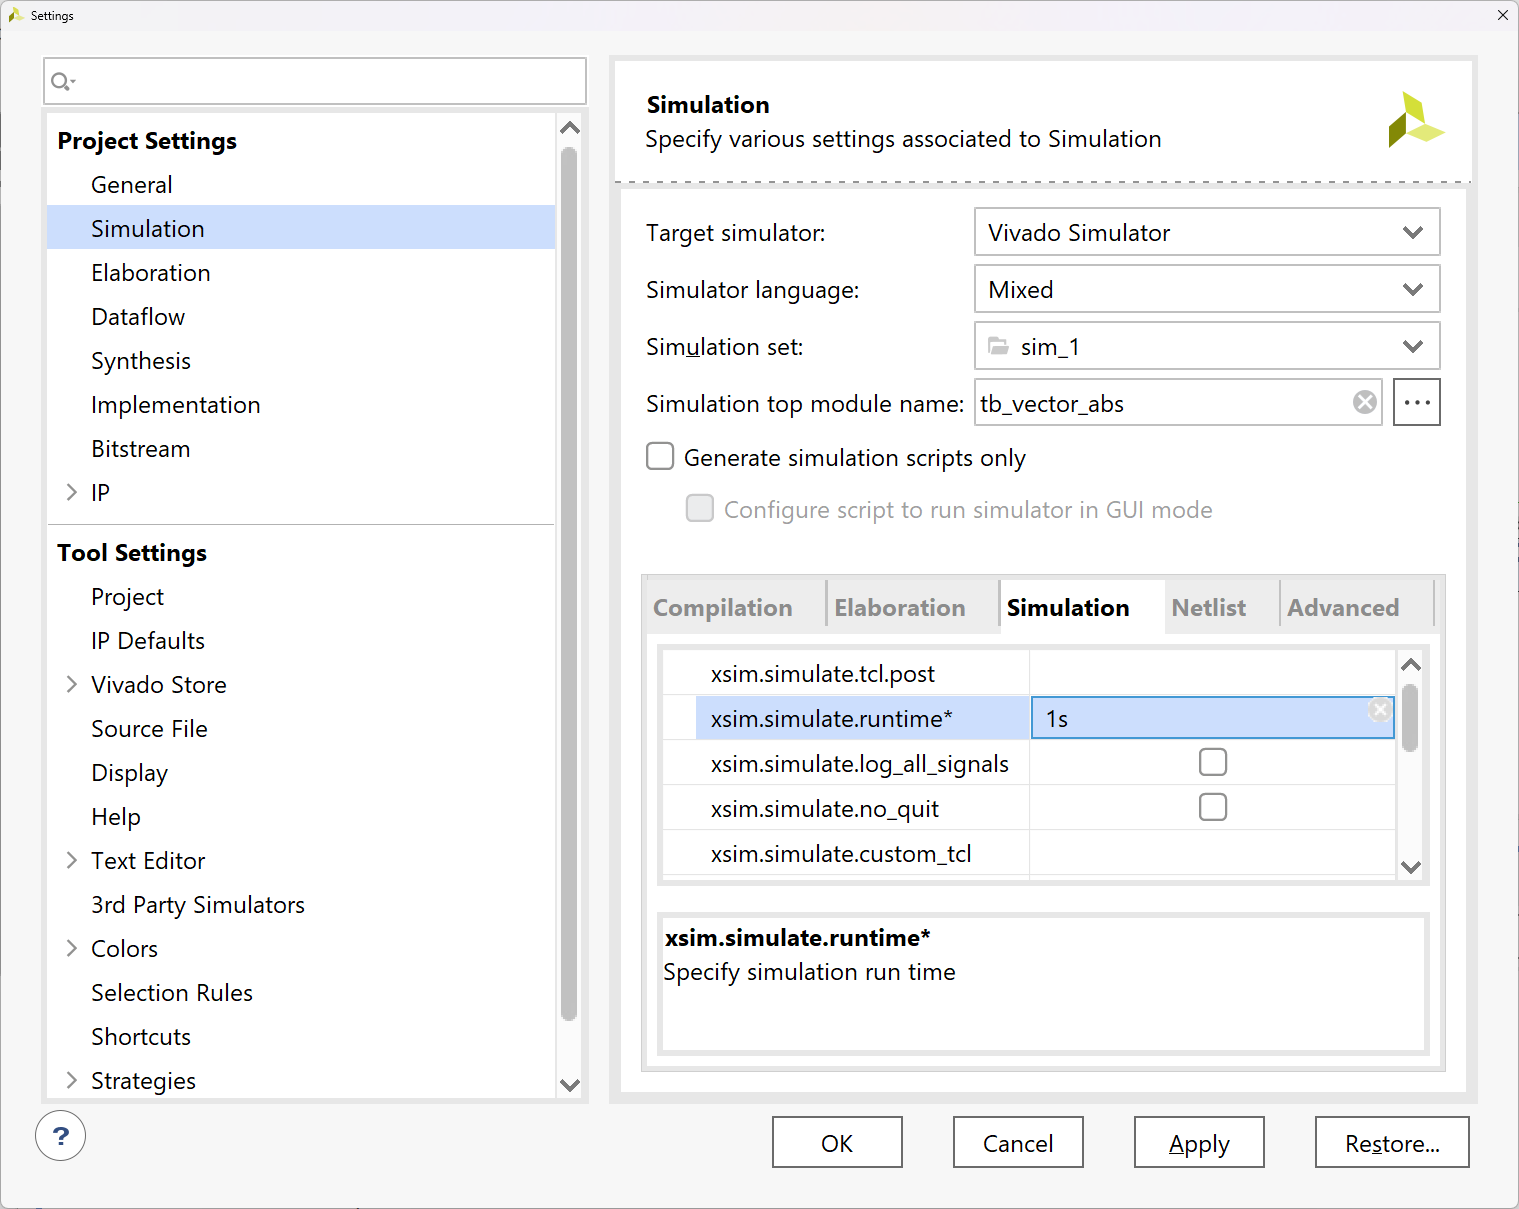
_Figure 2. Example of simulation time configuration._
One second is a very large value, many orders of magnitude greater than the simulation time in most lab assignments. However, the testbench in every lab will stop the simulation early. By setting such a large value, we avoid having to specify the simulation duration each time: the simulation will simply run until it stops on its own, but if the testbench fails to stop it for some reason, we know it will stop automatically after 1 s.
## Vivado Settings
### Pop-up Window Configuration
Also configure the pop-up window behavior when launching certain tools. Go to `Window Behavior -> Confirmations` in the global settings group (Tool Settings) and uncheck the options highlighted with red rectangles in _Figure 3_.
This will eliminate the persistent pop-up windows that in most cases simply require clicking "OK".
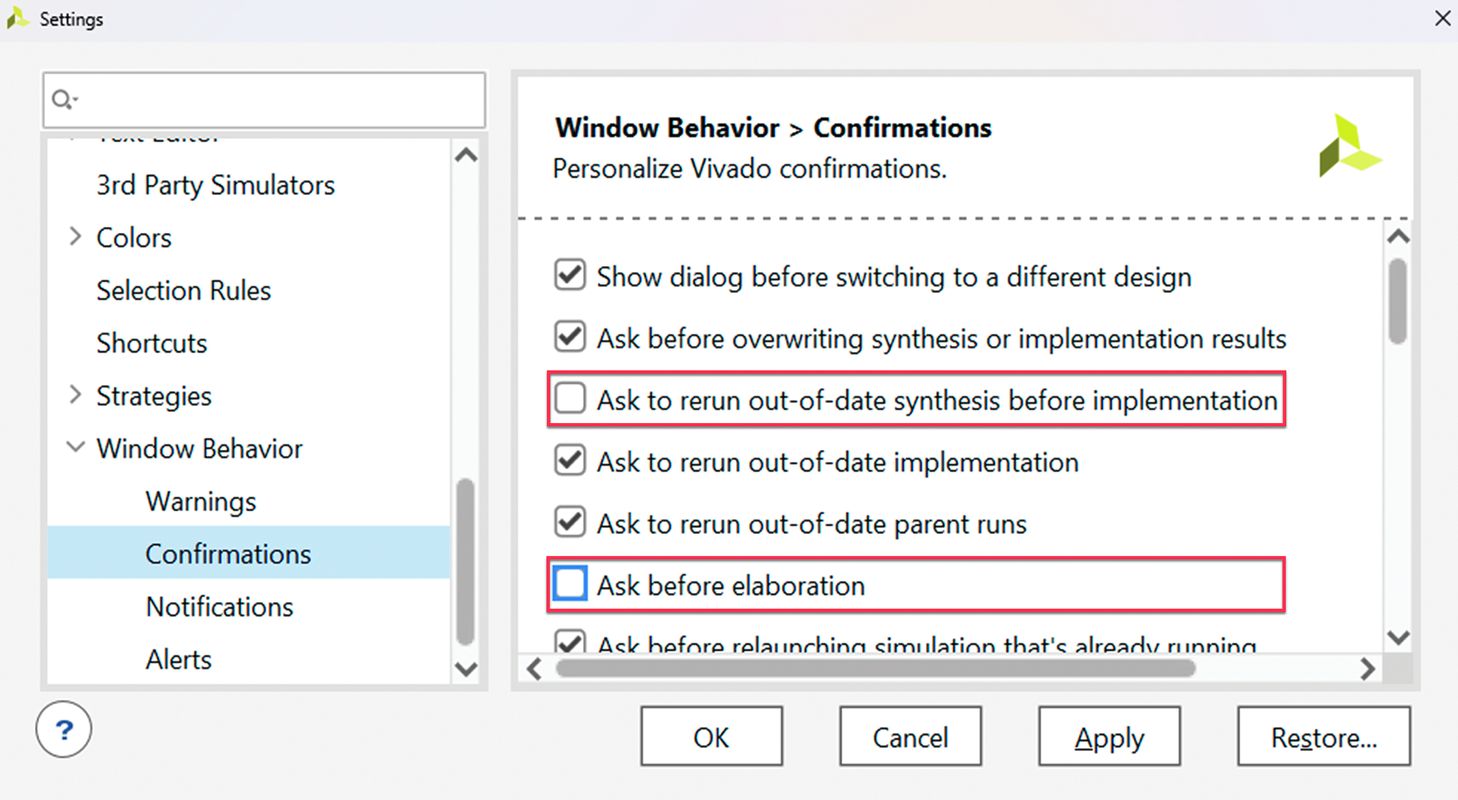
_Figure 3. Example of pop-up window configuration._
### Code Completion Settings
When working in Vivado, you may find the built-in code completion feature inconvenient. While active, Vivado attempts to suggest matching keywords as you type (see _Figure 4_).
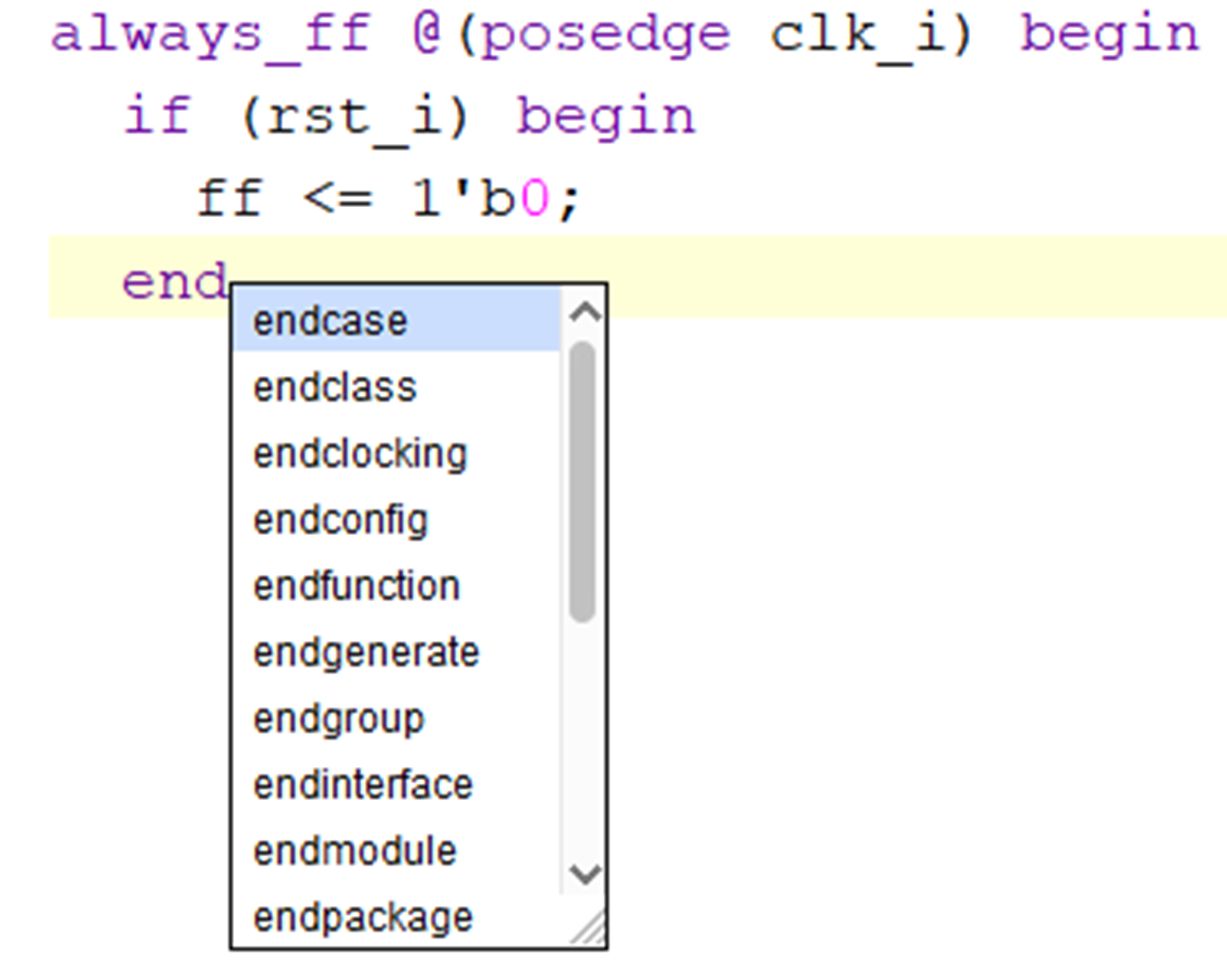
_Figure 4. Example of the code completion feature enabled._
In this situation, pressing Enter will not move the cursor to a new line. Instead, the active suggestion will be selected and the keyword `end` will be completed to `endcase`. To dismiss the list, press ESC or click anywhere outside the list.
To disable the list (or configure it to appear only on demand), go to `Text Editor -> Code completion` in the Vivado settings. You can choose one of three options (see _Figure 5_):
1. `Display list of choices on demand` — the list appears only when you press CTRL+Space.
2. `Display list of choices as you type` — the list appears automatically as you type.
3. `Disable code completion` — the list never appears.
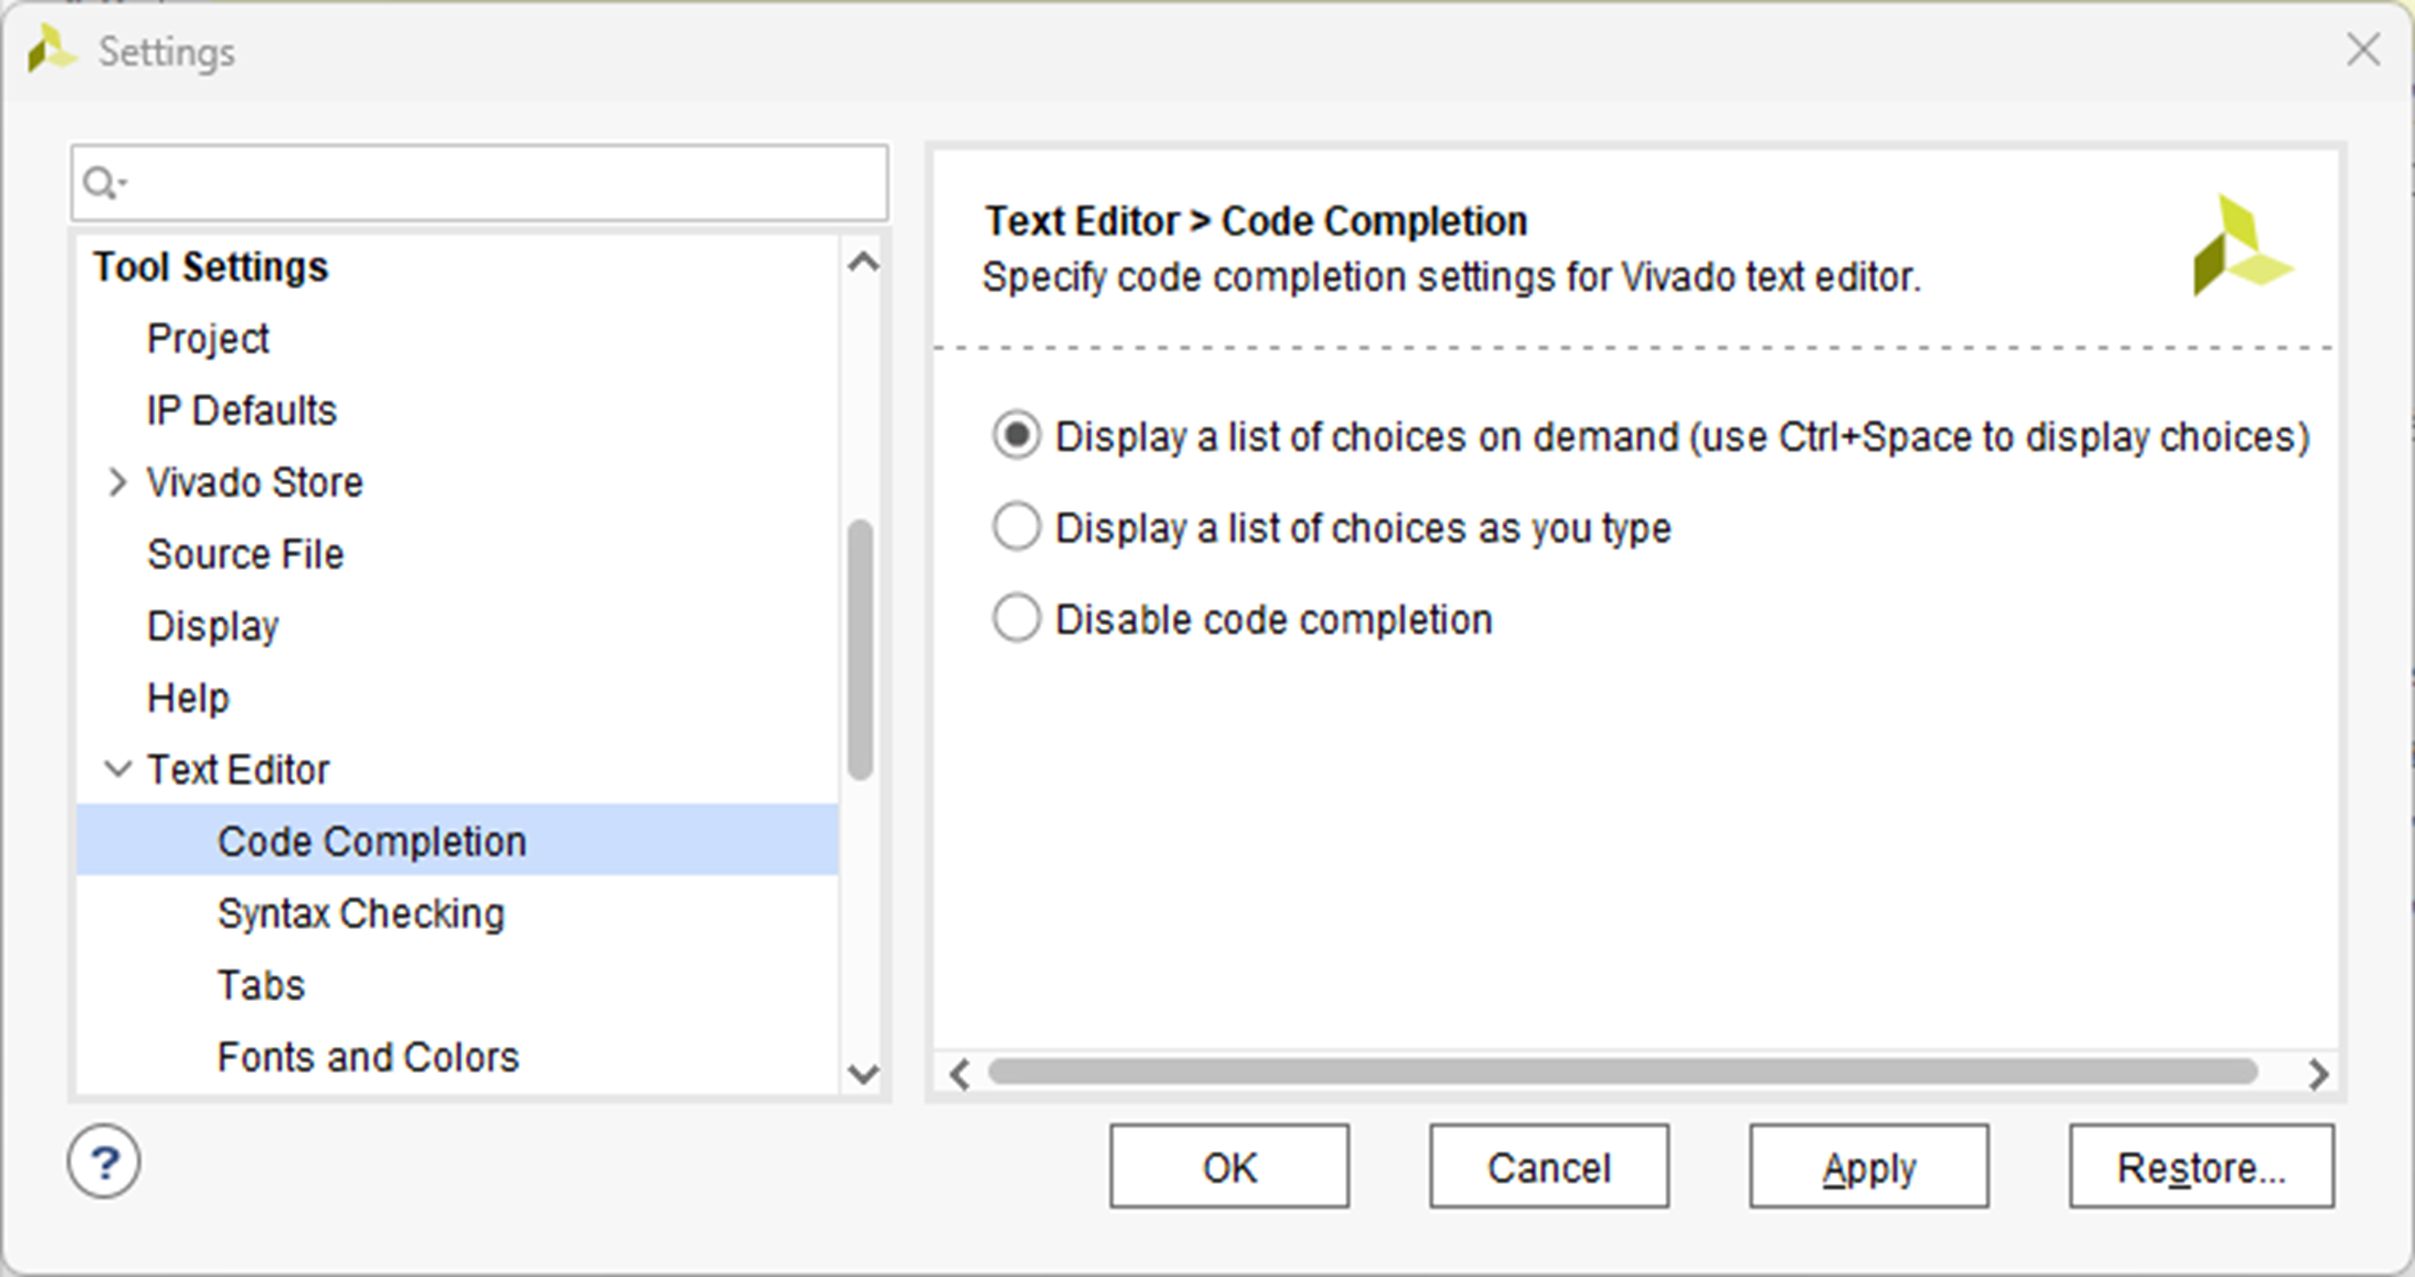
_Figure 5. Settings for the `Code completion` section._
### Font Settings
In the `Text Editor` settings group, you can also configure the size, color, and font used by the text editor. This is done in the `Fonts and colors` section (see _Figure 6_).
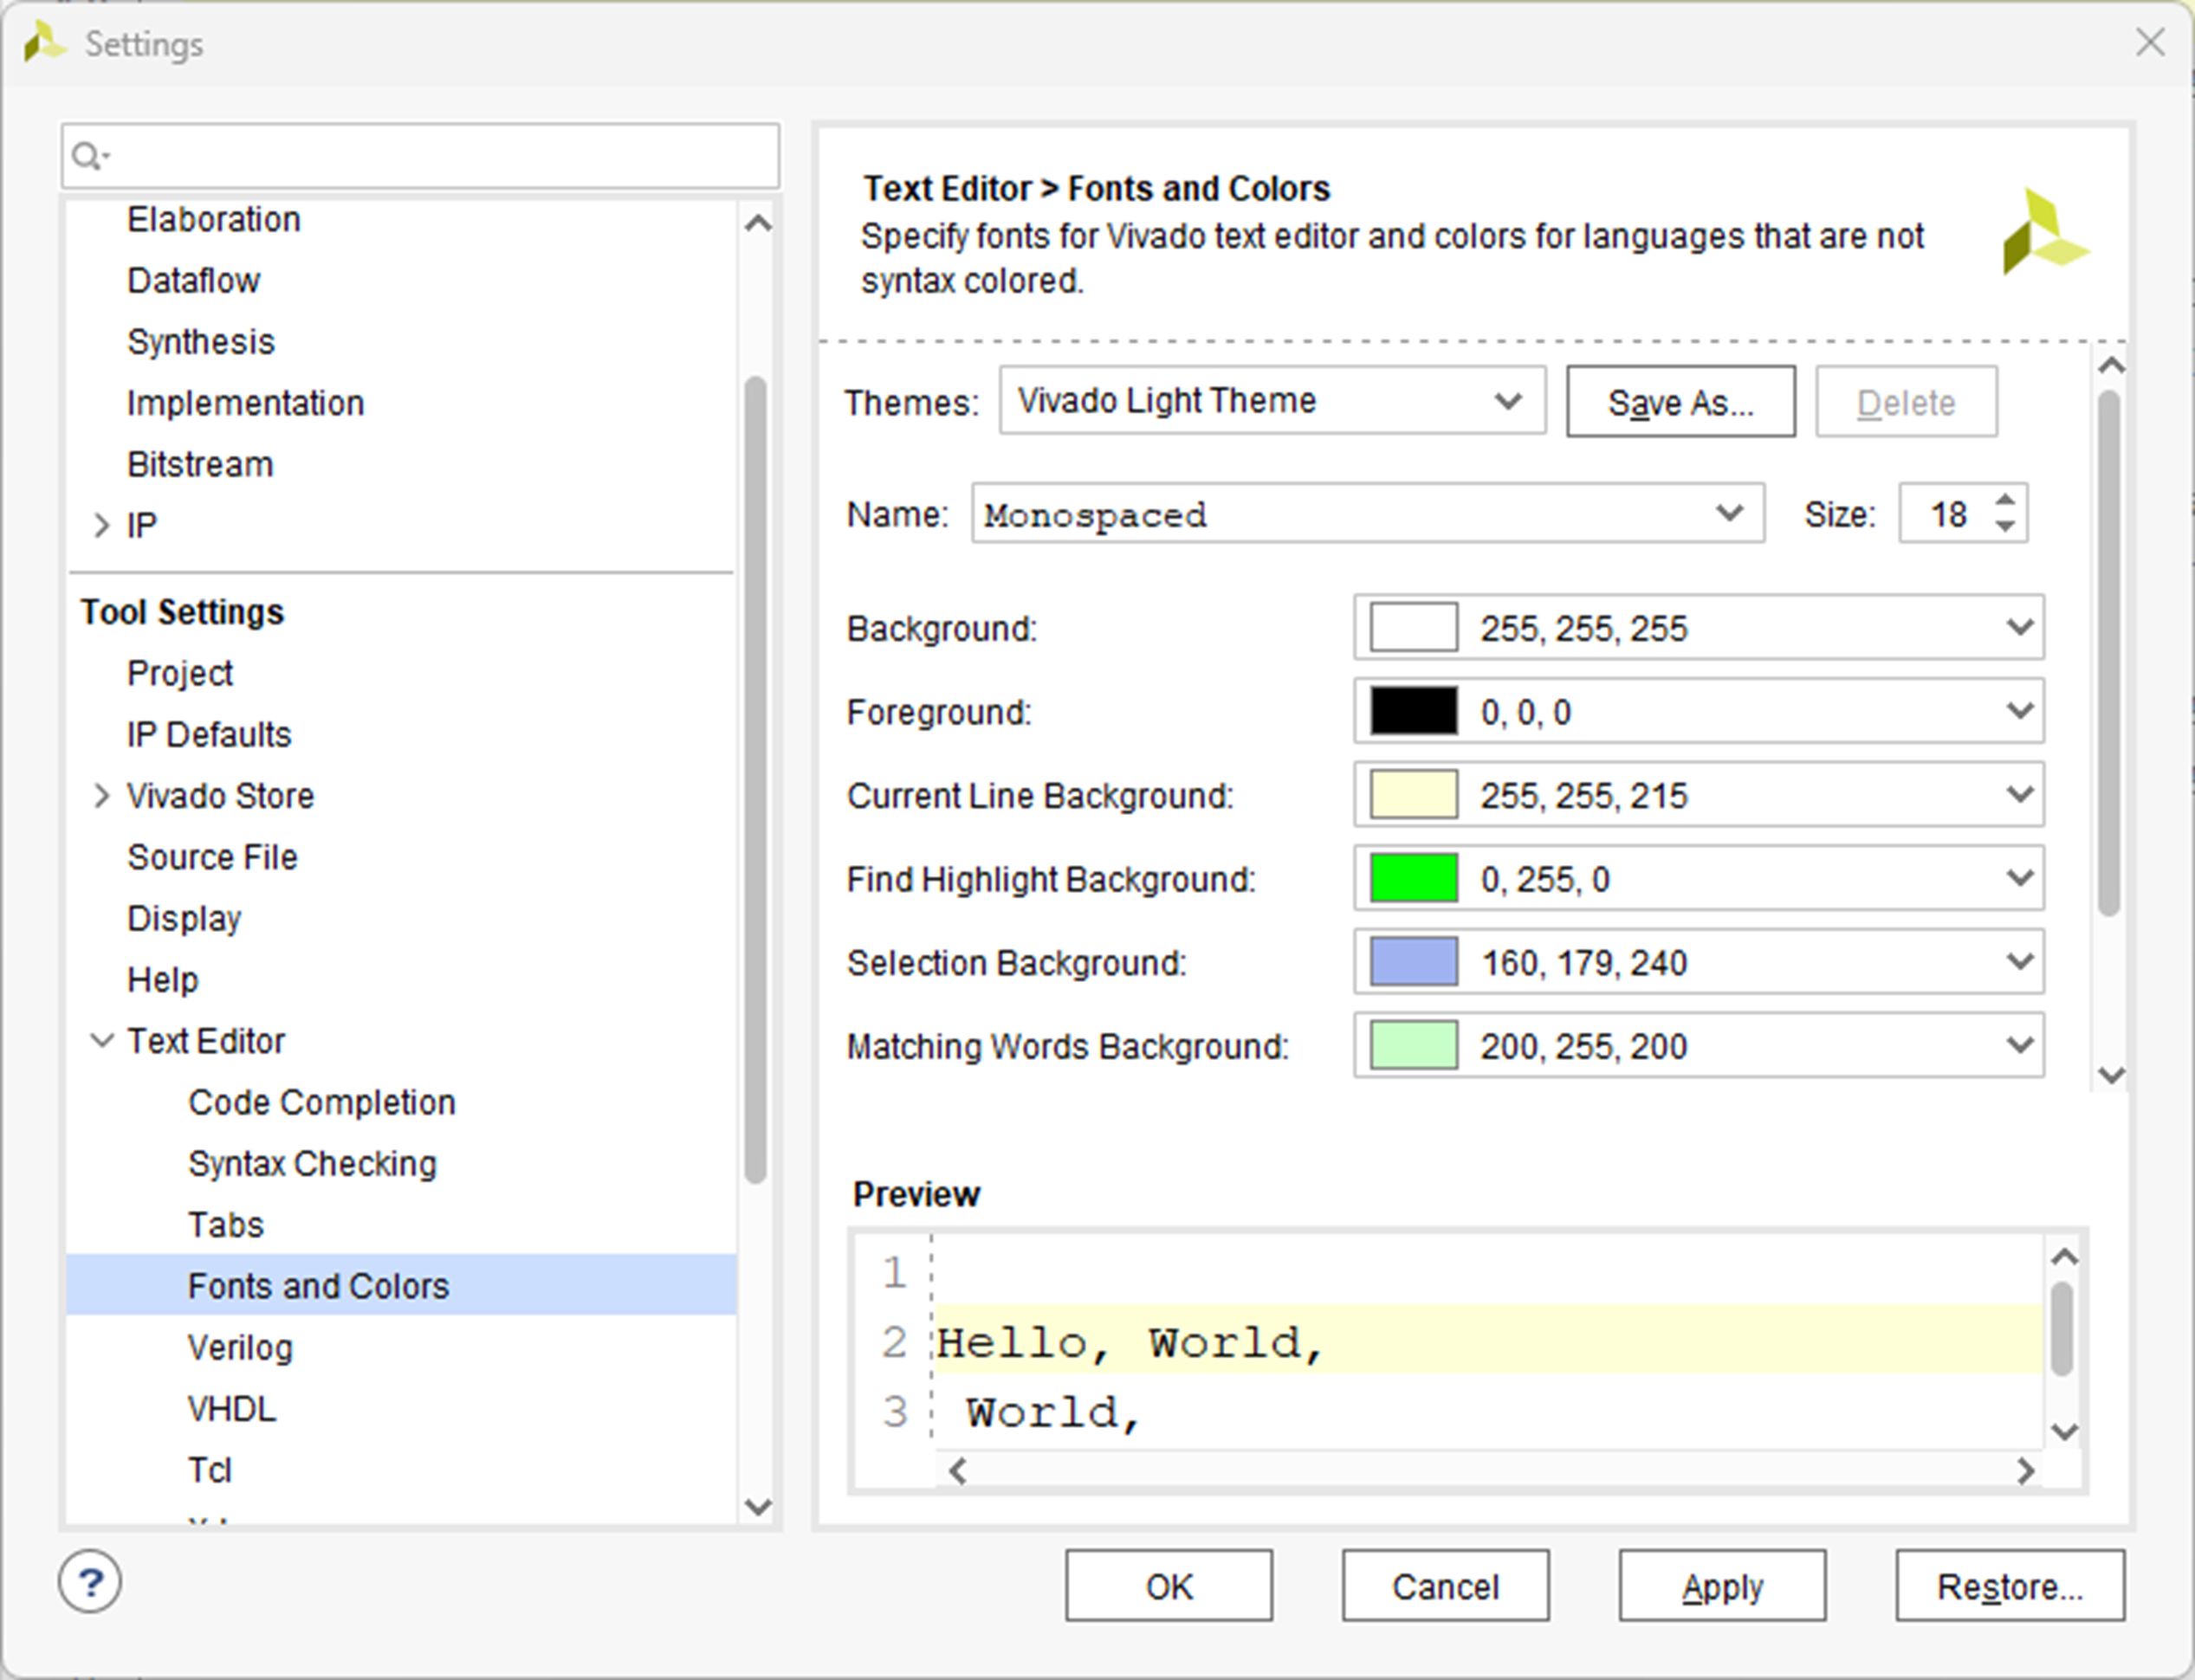
_Figure 6. Settings for the `Fonts and colors` section._
Project creation and configuration is now complete.